I remember the first time my daughter asked me for Tiramisu Bars. She had tried a slice at a friend’s birthday party, and her eyes lit up like I’d just promised her dessert every day that week. It was the kind of request that stuck with me because it wasn’t just about the sweetness; she wanted the cozy coffee flavor and that creamy mascarpone texture—but in a way she could grab and take on the go or share around the table. Making Tiramisu Bars for our family brought more than just a tasty treat to the kitchen; it became a new tradition for us at gatherings and casual dinners alike.
When I first attempted Tiramisu Bars, I ran into a few bumps. The classic tiramisu involves layers of ladyfingers dipped in espresso and a creamy mascarpone mix, but transferring that into bars without losing the essential creaminess took some trial and error. I learned that keeping the mascarpone dessert bars smooth and the coffee-soaked base just right was key. After that, the recipe stuck in my meal rotation because it fit perfectly for busy nights or special celebrations where something easy yet impressive was needed.
This Tiramisu Bars recipe is no-bake, which means less fuss and more time to enjoy with your loved ones. Whether you’re after easy tiramisu dessert options or coffee flavored bars that taste like a little Italian escape, these bars deliver. My family loves them straight from the fridge, cold and creamy, with just the right balance of sweetness and coffee kick. This recipe has definitely earned a spot in our dessert favorites, and I’m excited for you to try it with your family too. It’s a wonderful way to bring everyone together, share stories, and create some new delicious memories around the table.
What’s special about these Italian tiramisu squares is how adaptable they are. You can make them your own with little twists—the secret’s in the simple quality ingredients and a little care while layering. If you love mascarpone dessert bars but want something easier than the traditional tiramisu, this recipe fits right in. Also, if your family enjoys recipes like these, you might find a sweet surprise in our lemon marbled cheesecake bars or cranberry lemon bars.
Before we dive into the details, feel free to check out some inspiration for homemade tiramisu at Easy Tiramisu recipe – Tastes Better From Scratch. And if you want a café-style twist, there’s a unique espresso chip tiramisu cookie bars recipe on typefoodie.com that pairs espresso and dessert in a fun way. Let’s get ready to make your kitchen smell like coffee and happiness with this inviting tiramisu bars recipe.
What You’ll Need
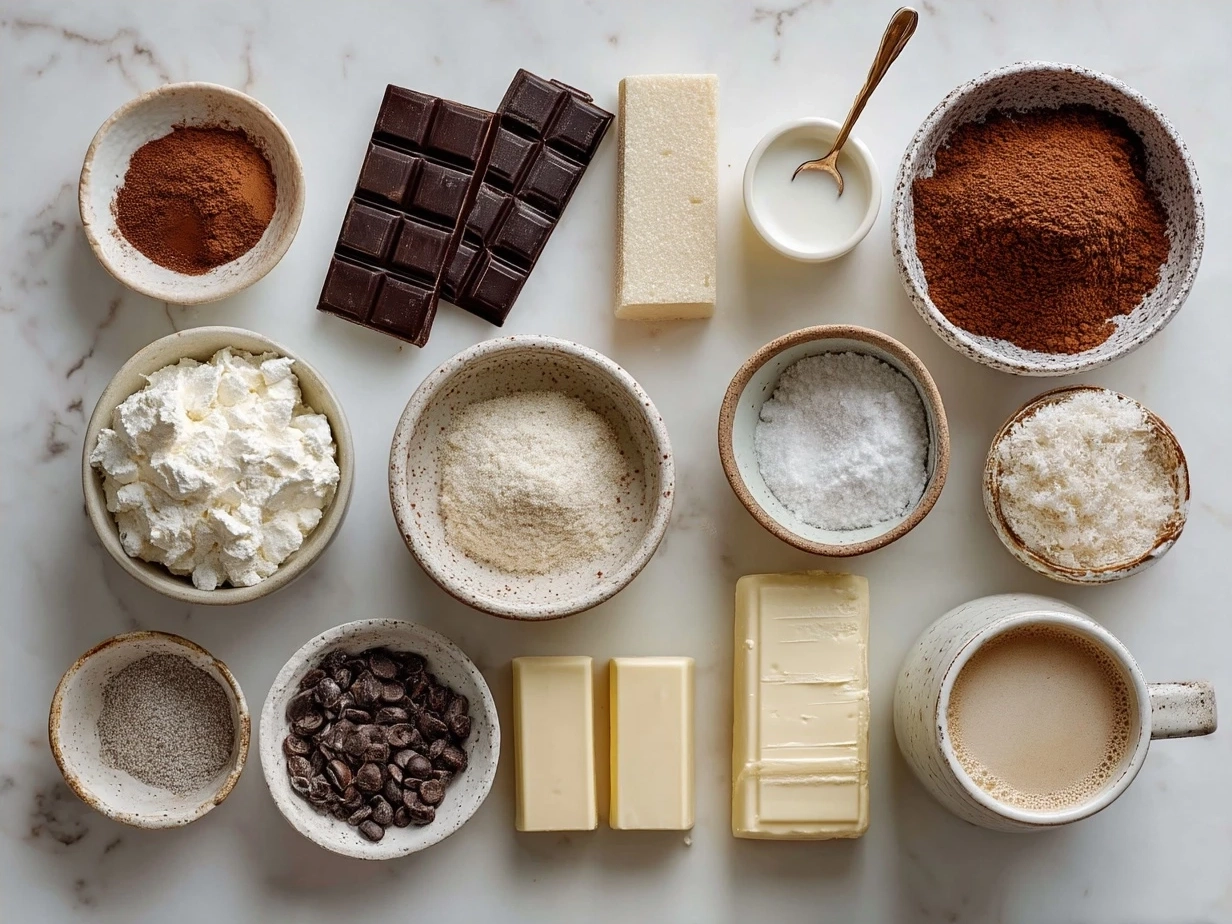
When it comes to making Tiramisu Bars, I like to keep the ingredient list straightforward but reliable. Here’s what you’ll need to bring that classic tiramisu flavor into easy-to-serve bars:
- 1 ½ cups ladyfingers, crushed (or ladyfinger-style cookies)
- 1 cup strong brewed espresso or coffee, cooled
- 1 tablespoon coffee liqueur (optional)
- 16 ounces mascarpone cheese, softened
- 1 cup heavy whipping cream
- ¾ cup granulated sugar
- 1 teaspoon vanilla extract
- Unsweetened cocoa powder, for dusting
For the best Tiramisu Bars, I recommend using fresh mascarpone cheese with a smooth texture. It really helps keep the mascarpone dessert bars creamy and rich. You’ll find everything at your regular grocery store’s dairy and coffee sections. If you can’t find ladyfingers, dry sponge cake or store-bought vanilla wafer cookies work well too and keep this an easy tiramisu dessert to whip up in a pinch.
This recipe is forgiving if you need to swap the coffee liqueur for a little vanilla or simply omit it for a kid-friendly version. You can also use decaf coffee for smaller guests—and still get the full coffee flavored bars experience.
A quick tip: soften the mascarpone cheese to room temperature before mixing, so your Tiramisu Bars filling stays smooth. Also, chilling the brewed coffee before use prevents soggy crust and helps layers stay distinct.
My family prefers when I dust the top with cocoa powder just before serving—it makes the tiramisu bars look as good as they taste. If you want to try a little twist, check out these luxe cranberry tiramisu bars on momsGate.com for a seasonal flavor boost.
This ingredient list keeps things simple without sacrificing flavor or texture, making these Tiramisu Bars a favorite across all ages.
How to Make It
Making Tiramisu Bars is easier than you might think, and it’s a great recipe to keep in your back pocket for when you want an easy dessert that feels special. Here’s how I do it, step-by-step.
- Prepare your coffee soak. Brew a strong cup of espresso or coffee and let it cool completely. Stir in coffee liqueur if using. You’ll want to dip your ladyfingers in this mix shortly before assembling to soak up that bold coffee flavor.
- Crush your ladyfingers. You can buy them crushed or do it yourself by placing them in a zip-top bag and gently pounding with a rolling pin. This forms your base layer for the bars.
- Mix the creamy filling. In a bowl, beat together softened mascarpone cheese, granulated sugar, and vanilla extract until smooth. In a separate bowl, whip the heavy cream until stiff peaks form, then gently fold it into the mascarpone mixture. This combo makes your luscious mascarpone dessert bars filling.
- Layer your bars. Press half the crushed ladyfingers mixture into a baking dish to create the base. Give the remaining ladyfingers a quick dip in the coffee soak, then add a layer on top of the crust. Spread half the mascarpone cream over that layer. Repeat with remaining ladyfingers and mascarpone cream.
- Chill. Cover and refrigerate for at least 4 hours, preferably overnight to let the flavors meld and bars set up firm. Your kitchen will smell amazing with the coffee and sweet mascarpone filling mingling during this time.
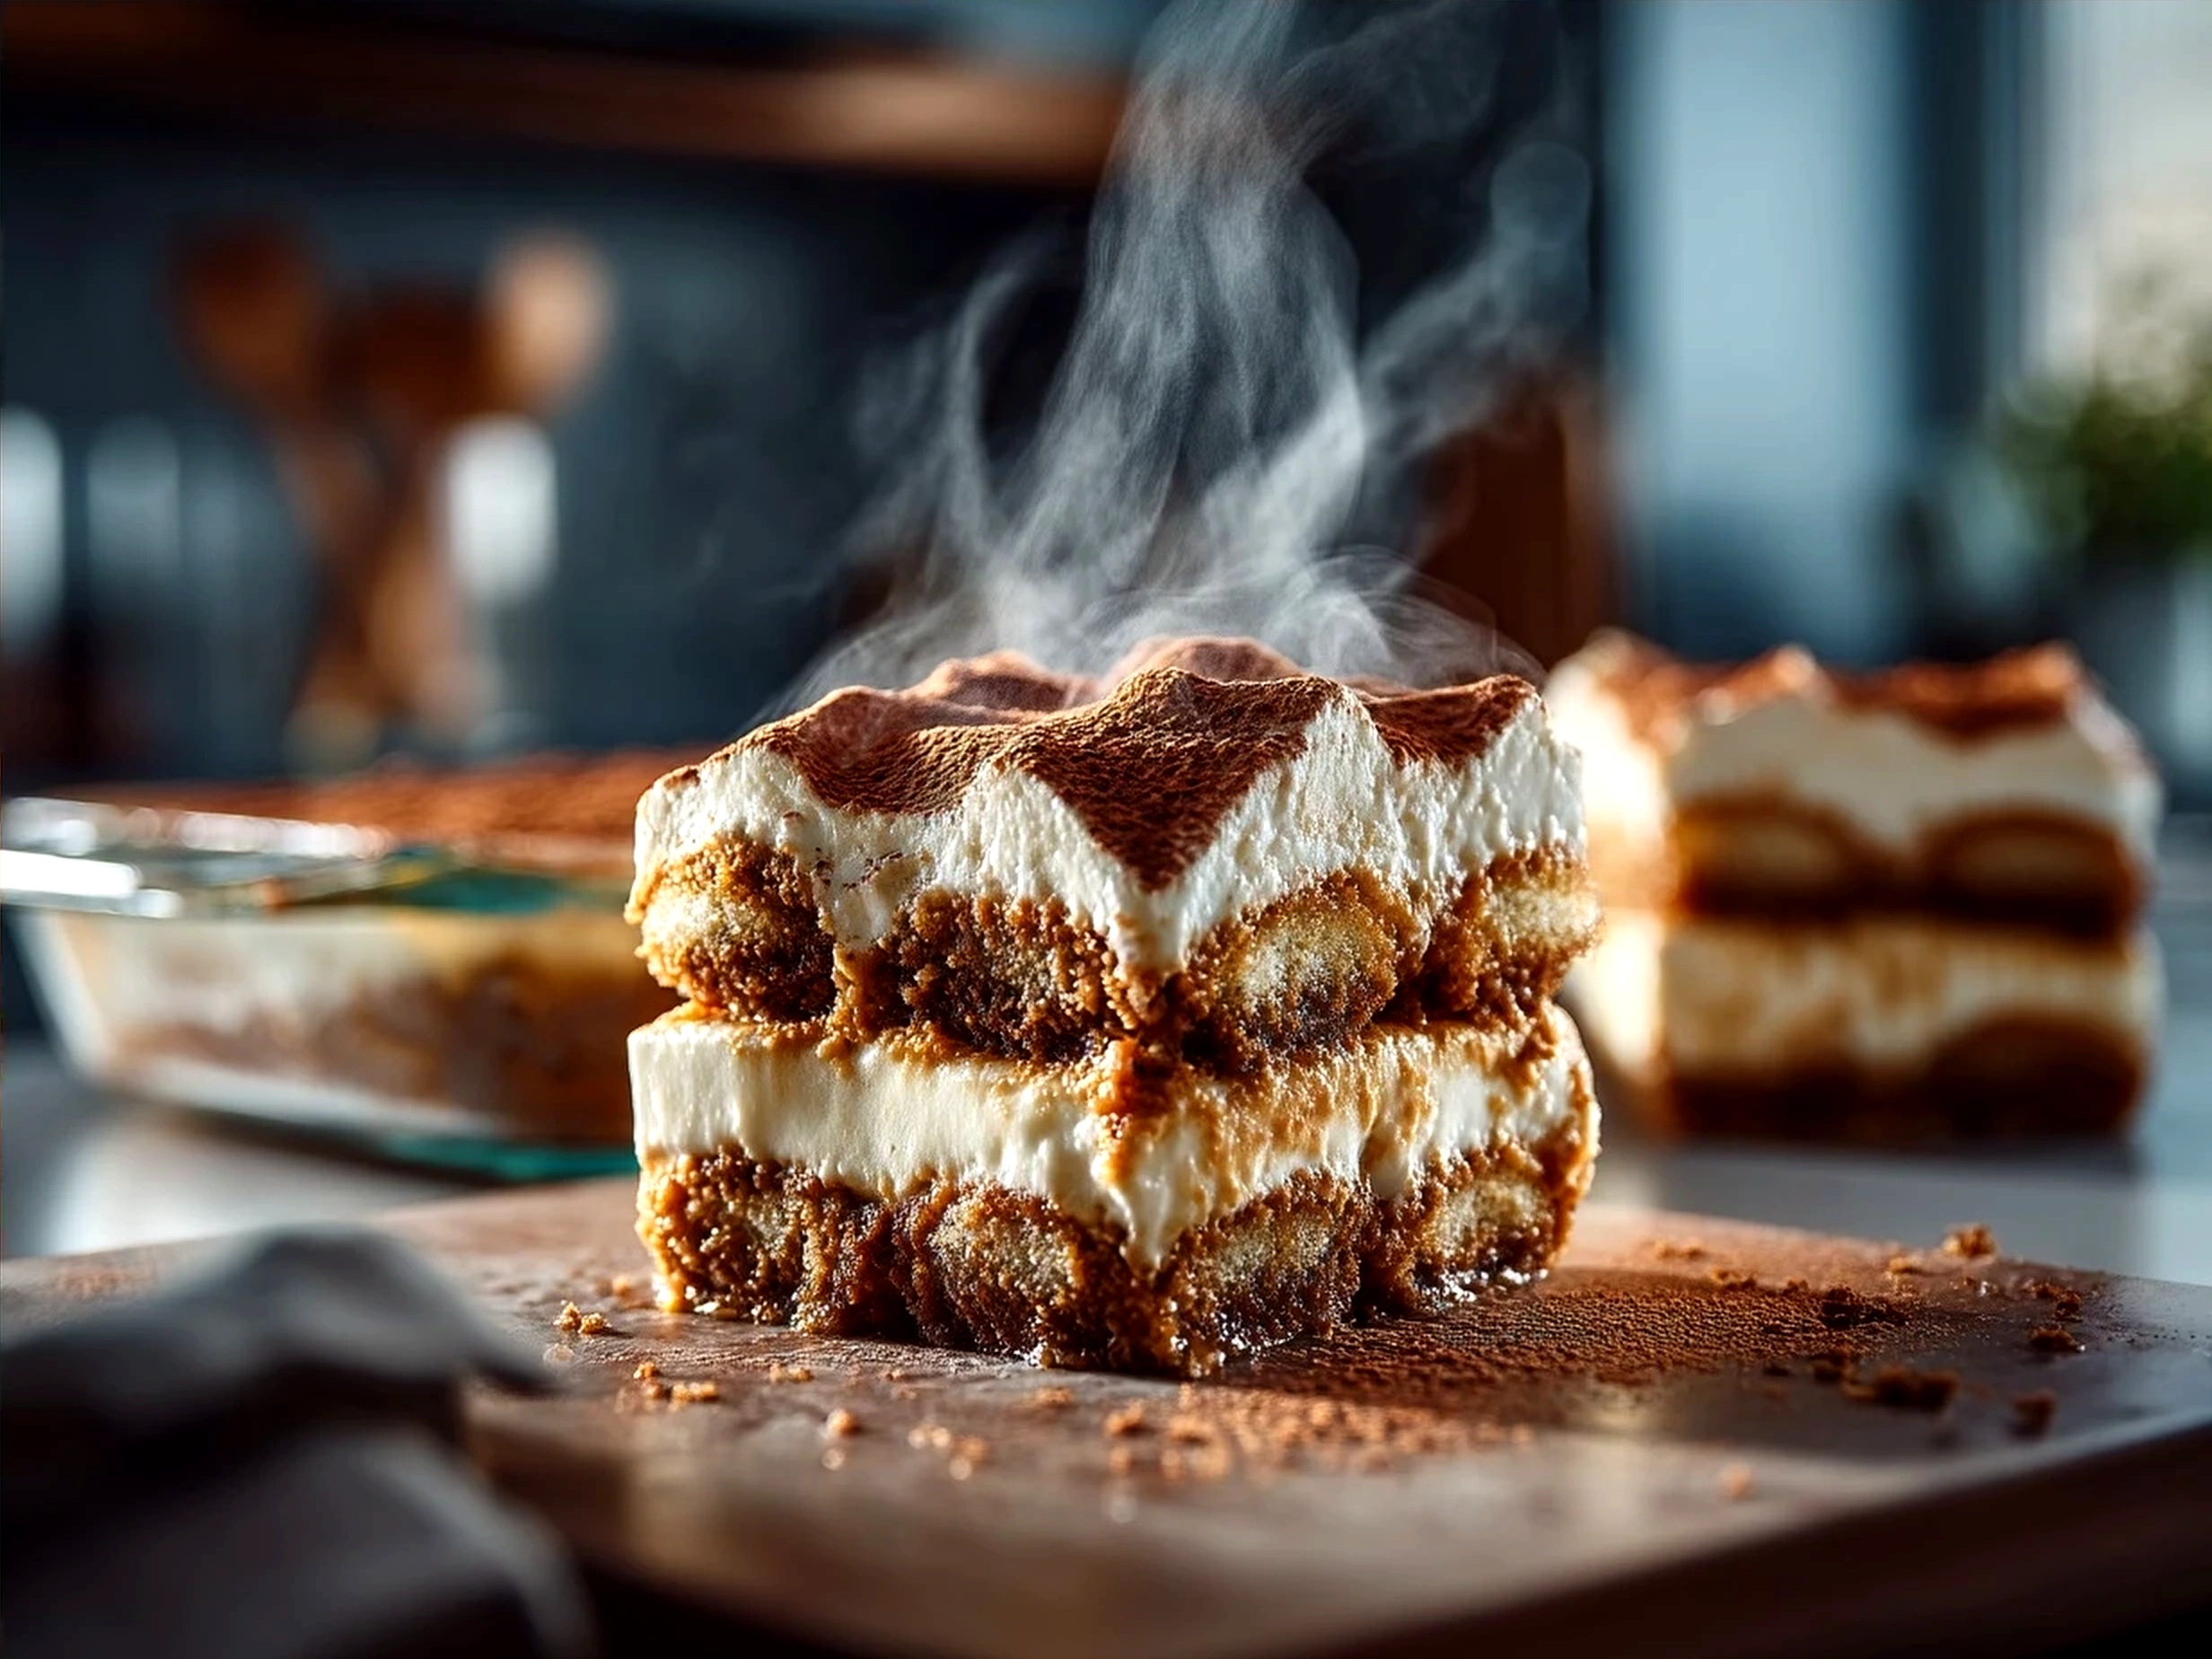
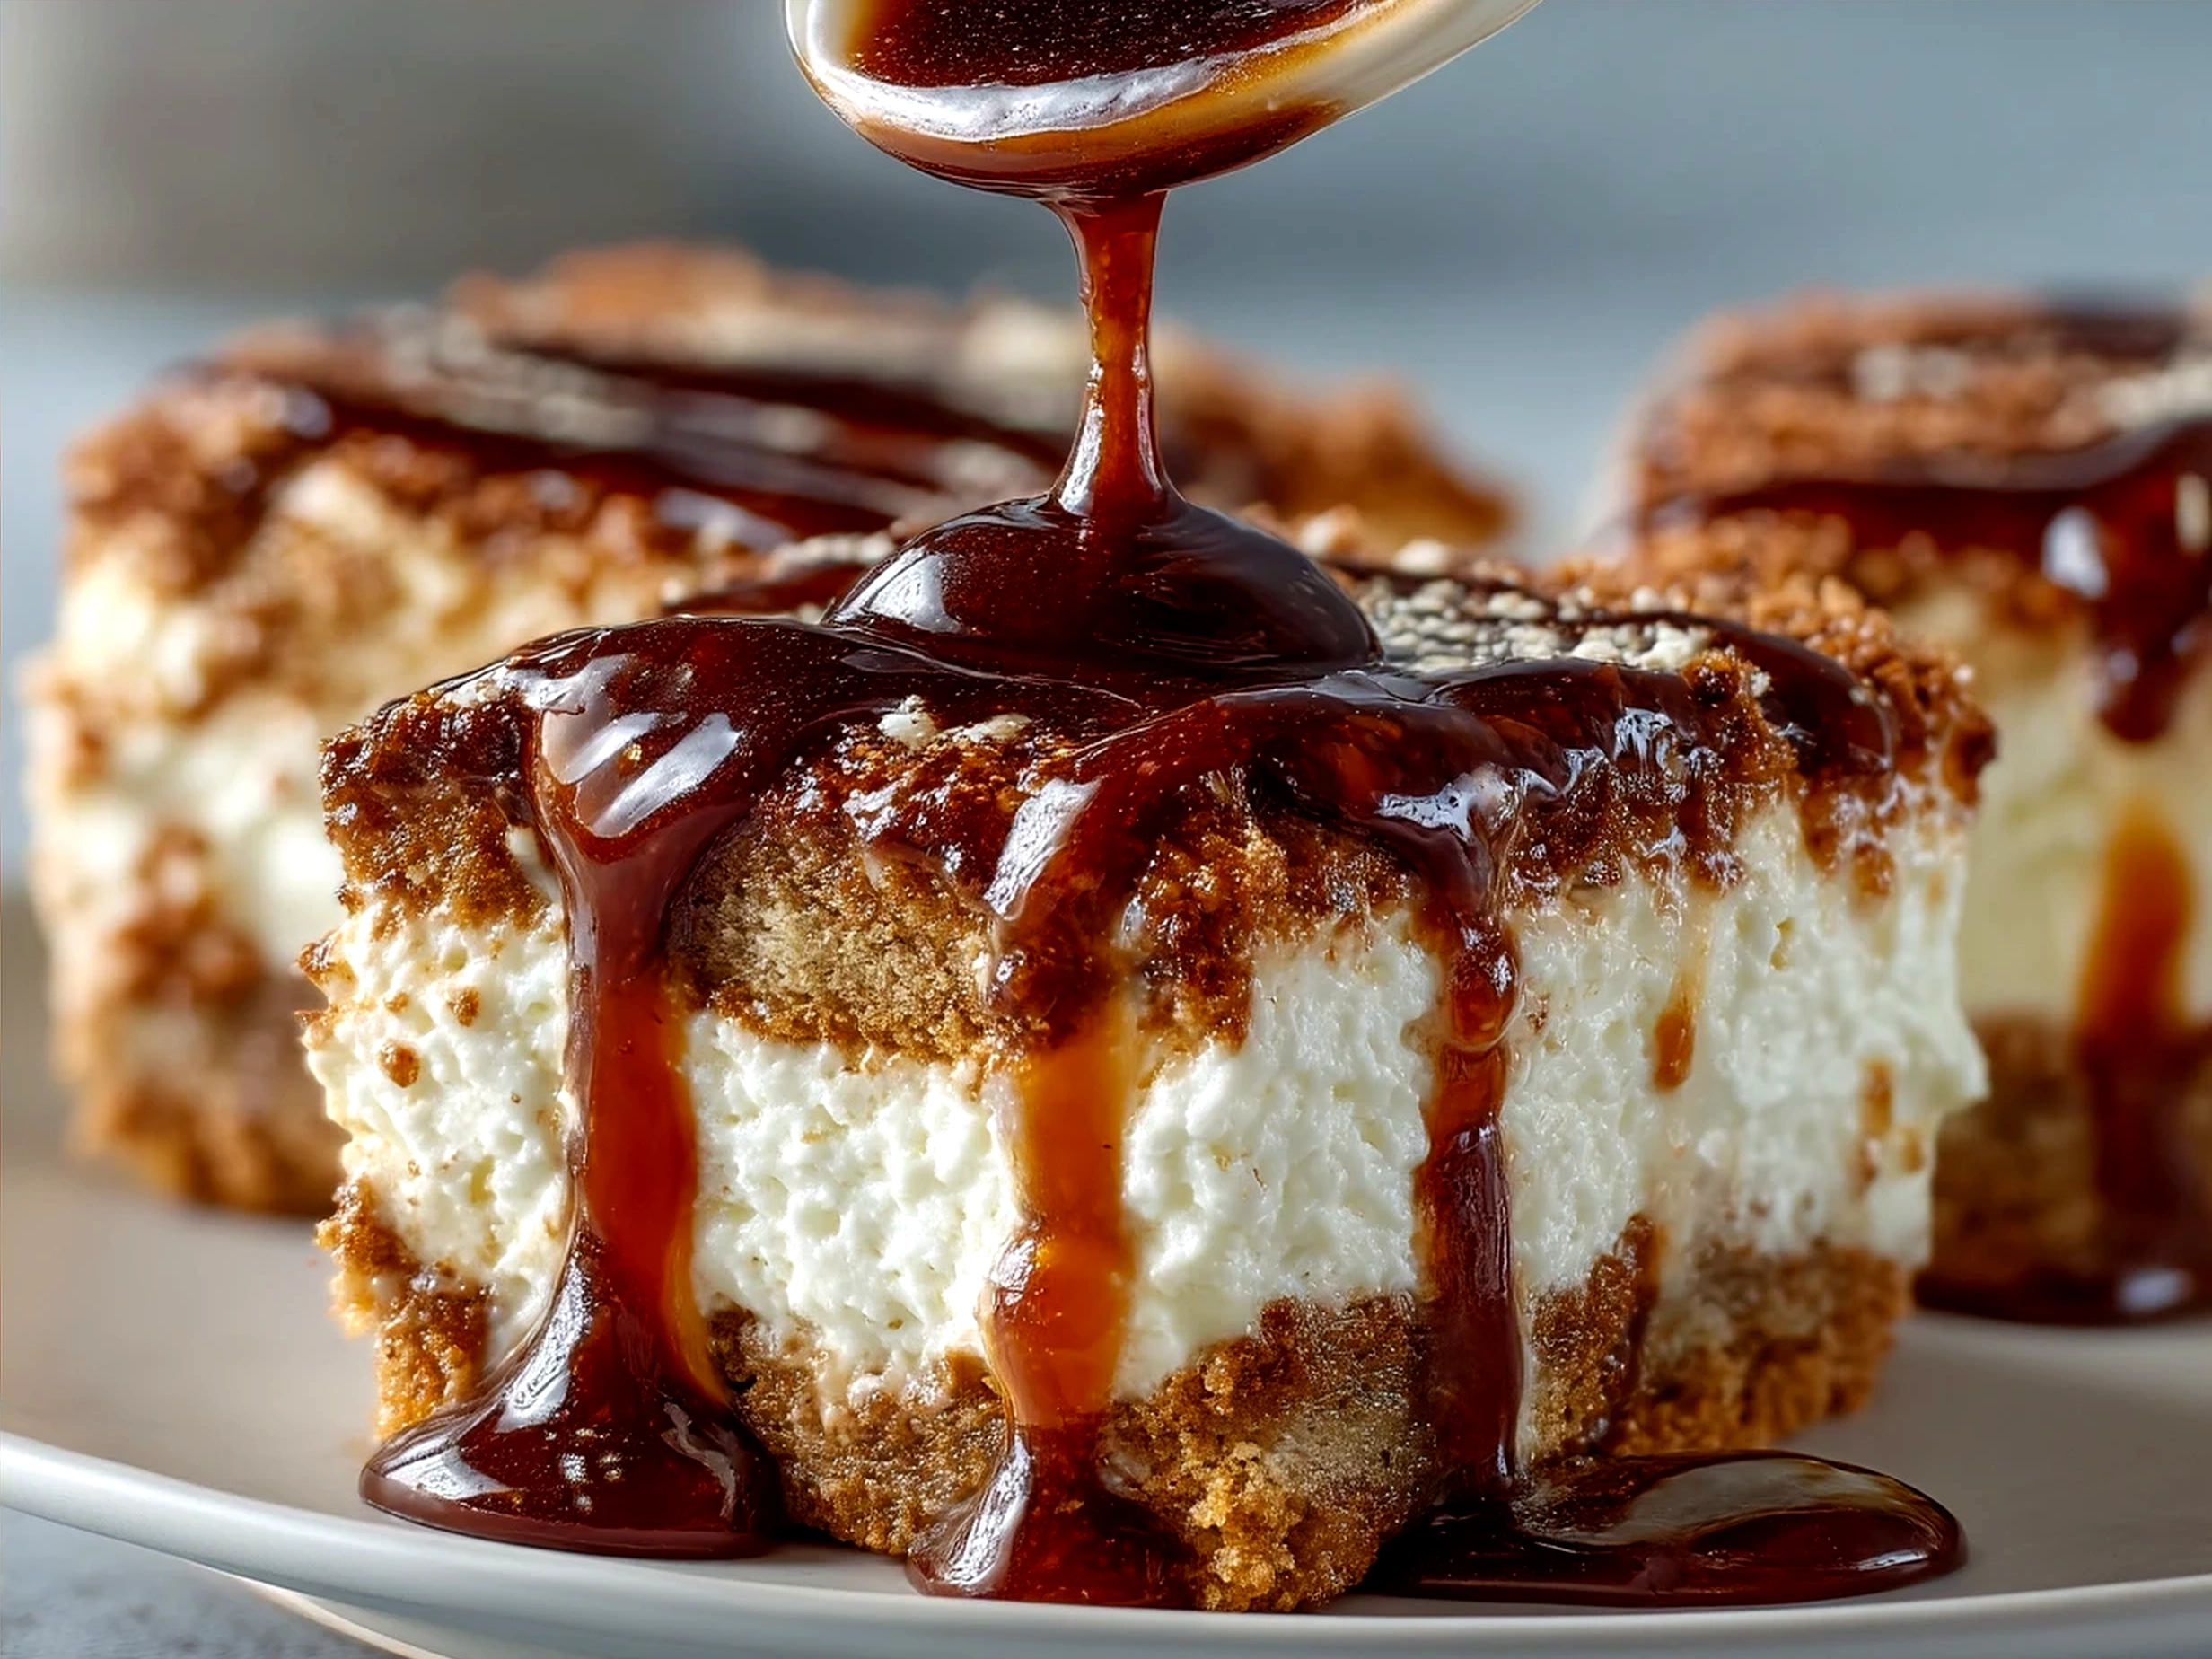
- Dust and slice. Before serving, dust the top lightly with cocoa powder for that classic tiramisu look. Use a sharp knife dipped in hot water for cleaner slices of your Italian tiramisu squares.
This Tiramisu Bars recipe typically takes me about 15 minutes hands-on, then a patient wait. Don’t worry if your layers look a little uneven; it all comes together in flavor after chilling. If your mascarpone filling seems too runny, chilling it a bit longer helps it set.
While your Tiramisu Bars is chilling, you’ll have time to tidy up or set the table—a big win for busy home cooks. For some inspiration on similar no-bake desserts, check out the lemon marbled cheesecake bars or cranberry lemon bars on momsGate.com to keep these dessert wins coming.
Serving Ideas
Our family can’t get enough of these Tiramisu Bars. They make a wonderful finish to a casual weeknight meal or a special dessert at celebrations. Everyone reaches for seconds when this Tiramisu Bars comes out with a dusting of cocoa and a fresh cup of coffee or milk.
These bars are perfect on their own, but if you want to make a full tiramisu-inspired dessert platter, try serving alongside fresh berries or a simple chocolate drizzle. The coffee flavored bars bring a rich taste, balanced by the creamy mascarpone layers, that pairs beautifully with fruit or a light cookie.
For a more festive occasion, adding a quick sprinkle of shaved dark chocolate on top makes these bars look as good as they taste. I’ve also tried layering in a bit of nutmeg or cinnamon into the mascarpone filling for a cozy holiday twist.
If you have leftovers, Tiramisu Bars keep great in the fridge for up to 3 days in an airtight container. We find the flavor actually deepens after a day, making it perfect for making ahead of time. If your family loves these bars, try the luxe cranberry tiramisu bars for a lovely variation that adds a twist of tart cranberry to the classic taste.
I’ve heard from readers that Tiramisu Bars work well as an easy no-bake tiramisu bars option for potlucks and picnics, especially when cut into small squares. Presentation tip: serve on a pretty plate with a dusting of cocoa for an inviting look.
For more ideas or to mix up your dessert game, check out classic tiramisu-inspired recipes like this espresso chip tiramisu cookie bars on typefoodie.com or even a twist like tiramisu protein bars from immigrantstable.com when you want something a little different but still full of that great coffee mascarpone flavor.
Your Questions Answered
Can I make this Tiramisu Bars ahead of time?
Absolutely. Making it the day before is ideal since the bars need a few hours to chill and set. My family loves it even more the next day when the flavors have melded perfectly.
What if I don’t have ladyfingers?
No problem—vanilla wafers or sponge cake cubes make a great substitute. This Tiramisu Bars recipe is forgiving and flexible with the base.
How do I store leftover Tiramisu Bars?
Keep them in an airtight container in the fridge for up to 3 days. The longer they chill, the better the flavors get.
Can I skip the coffee liqueur?
Yes, especially if serving kids. The coffee soak still gives the bars that coffee rich flavor without alcohol.
What’s best to dust on top?
Classic cocoa powder is my go-to. You can also try finely grated chocolate or cinnamon for a twist.
How can I make my mascarpone dessert bars extra creamy?
Make sure the mascarpone is at room temperature before mixing and fold in whipped cream gently to keep it light.
Do Tiramisu Bars need to be refrigerated at all times?
Yes, these mascarpone dessert bars are dairy-based and should stay refrigerated for food safety and best texture.
If you want to check out more detailed tips for tiramisu or similar creamy desserts, there’s a great easy tiramisu recipe at Tastes Better From Scratch that shares helpful ideas on how to balance coffee and cream flavors.
The Final Word
This Tiramisu Bars recipe has earned its place in my family’s recipe collection because it’s a dessert that delivers indulgent flavor without complicated steps. The balance of coffee-soaked bars and smooth mascarpone filling suits busy weeknights and special celebrations alike.
My Tiramisu Bars Tips:
– Always soften mascarpone before mixing for the best texture.
– Chill the bars at least 4 hours for clean slicing and rich flavor.
– Dust cocoa powder just before serving for a fresh, inviting finish.
I’ve tried variations like adding a hint of dark chocolate, mixing in a splash of amaretto, and swapping ladyfingers for vanilla wafers—all with great responses from my family. My daughter loves hers with a little extra cocoa dusted on, while my husband prefers a bit of espresso flavor strengthened in the soak.
This recipe is also a great jump-off point for making your own Italian tiramisu squares to suit your family’s tastes. I hope it becomes a staple for you as it is for us, a dessert that brings sweetness and togetherness to your table with every bite.
If you love sharing these tiramisu bars with your family, you might also enjoy creative dessert ideas like lemon marbled cheesecake bars or cranberry lemon bars featured on momsGate.com. And don’t forget to check out luxe cranberry tiramisu bars for a seasonal spin.
Here’s to serving up smiles and savoring every moment your family gathers for some coffee flavored bars magic. Happy cooking!
Tiramisu Bars
Delight in these easy-to-make Tiramisu Bars that capture the classic Italian dessert flavors in a convenient bar form, perfect for sharing or on-the-go treats.
- Prep Time: 20 minutes
- Cook Time: 0 minutes
- Total Time: 4 hours 20 minutes
- Yield: 16 servings
- Category: Dessert
- Method: No-Cook
- Cuisine: Italian
Ingredients
- 1 cup strong brewed coffee, cooled
- 2 tbsp coffee liqueur (optional)
- 24 ladyfinger cookies
- 8 oz mascarpone cheese, softened
- 1 cup heavy cream
- 1/2 cup granulated sugar
- 1 tsp vanilla extract
- 2 tbsp cocoa powder, for dusting
- Dark chocolate shavings (optional)
Instructions
- In a shallow dish, combine brewed coffee and coffee liqueur; quickly dip each ladyfinger and arrange them in a single layer in a 9×9 inch square pan.
- In a mixing bowl, beat mascarpone cheese until smooth.
- In a separate bowl, whip heavy cream, sugar, and vanilla extract until stiff peaks form.
- Gently fold whipped cream into the mascarpone until well combined.
- Spread half of the mascarpone mixture over the ladyfingers in the pan.
- Add another layer of dipped ladyfingers on top of the mascarpone layer.
- Spread the remaining mascarpone mixture evenly over the top layer of ladyfingers.
- Cover and refrigerate for at least 4 hours or overnight to set.
- Before serving, dust with cocoa powder and sprinkle with dark chocolate shavings if desired.
- Cut into bars and serve chilled.
Notes
For an alcohol-free version, omit the coffee liqueur and use extra brewed coffee. Refrigerate bars tightly covered to keep them fresh for up to 3 days.